
You do not need another long AI course before you are allowed to make something. You need a small, complete project, a protected block of time and a workflow you can repeat.
This is called the 5-minute syllabus because the whole map can be understood in five minutes: set up, build, check, publish, repeat. Completing it properly takes one focused afternoon, usually three to five hours for a complete beginner. That distinction matters. The route is compressed, but the useful work still requires attention and effort.
Artificial intelligence has created an unusual divide. One group spends months collecting tools, tutorials and prompt libraries. Another group spends a few focused hours making a rough but real artefact, showing it to somebody and improving it. Six months later, those groups are no longer in the same place.
The advantage does not come from knowing every model name. It comes from shortening the distance between an idea and evidence.
Your objective is not to “learn AI”. Your objective is to leave the session with a working environment, a public artefact and a reliable method for making the next one.
What you will have by the end
If you follow the guide, you will finish with five concrete things:
- A writing and building workspace on your own computer.
- Version history, so experiments are recoverable rather than frightening.
- An AI coding assistant that can inspect and edit a project with you.
- A small website or tool that solves one clearly stated problem.
- A public link you can send to a colleague, student, customer or collaborator.
You do not need to become a programmer first. You do need to stay responsible for the outcome. The AI can propose, draft and edit. You still choose the problem, protect sensitive data, test the result and decide what is published.
The afternoon at a glance
| Time | Stage | Tangible result |
|---|---|---|
| 0:00 to 0:15 | Frame the work | One user, one problem, one definition of done |
| 0:15 to 1:15 | Set up | Editor, Git, GitHub and assistant working |
| 1:15 to 2:45 | Build | A first useful version running locally |
| 2:45 to 3:30 | Check | Content, links, mobile view and privacy reviewed |
| 3:30 to 4:15 | Publish | A live URL connected to your repository |
| 4:15 to 5:00 | Improve or recover | Fixes, documentation and a short retrospective |
If setup takes longer, that is normal. Installing unfamiliar tools is cognitively expensive because every label is new. Do not interpret friction as inability. This is the only stage you must complete from scratch.
Before the clock starts
Protect a three-to-five-hour block. Close email and messaging apps. Put your phone in another room. Keep water nearby. Tell anyone who needs to know that you are unavailable.
Create a plain-text note called SESSION.md and answer four questions:
- User: Who is this for?
- Problem: What do they need to understand or do?
- Output: What will I publish today?
- Done: What must work before I stop?
For an academic, that might be: “Prospective research partners need a quick overview of my current work. I will publish a one-page research profile. It is done when the biography, three projects, contact link and mobile layout work.”
For a founder: “Warm leads are scattered across notes. I will build a private, local lead tracker with name, status, next action and notes. It is done when I can add, edit, filter and export sample records.”
Notice how small both definitions are. A first version is not a university platform or an enterprise CRM. It is one coherent outcome that can be tested today.
Choose the right first project
A good first build is useful, bounded, reversible and easy to inspect. A public profile website is ideal for most beginners because the output is visible, the risks are low and publishing is straightforward. A small local tool is suitable if your need is operational, but use invented sample data for this session.
Avoid anything that sends messages, spends money, makes decisions about people, handles confidential records or changes a live business system. You can learn those workflows later with proper safeguards.
Stage 1: Build your workspace once
You need five pieces. Four have free entry points; the AI assistant may require a suitable plan depending on the product and usage. Pricing and product access change, so check the official pages rather than relying on an old screenshot or this article.
1. Install Visual Studio Code
Download Visual Studio Code for Windows or macOS and accept the standard installation options. VS Code is the room in which the work happens: it shows your files, lets you edit text, opens a terminal and displays the changes proposed by an assistant.
Create a folder named first-ai-build inside your normal Documents folder. In VS Code, choose File → Open Folder and select it. Always open the folder, not a loose file. The folder is the project boundary that helps both you and the assistant understand what is in scope.
Open the built-in terminal using Terminal → New Terminal. You should see a prompt whose path ends with first-ai-build. That path is a useful safety check: before running a command, confirm you are inside the project you intend to change.
2. Install Git
Install Git and restart VS Code after the installer finishes. Git records snapshots of a project over time. It is more precise than “unlimited undo”: each snapshot has a message, changes can be compared, and a broken experiment can be separated from a working version.
In the VS Code terminal, run:
git --version
If you see a version number, Git is available. Then set the name and email attached to your work, replacing the examples with your own:
git config --global user.name "Your Name"
git config --global user.email "[email protected]"
Do not worry about learning every Git command today. You need only a short loop: see what changed, save a snapshot, and send it to GitHub.
3. Create a GitHub account
Create a free GitHub account, verify your email and turn on two-factor authentication. GitHub stores a copy of your Git project online and provides the bridge to publishing services.
Create a new repository called first-ai-build. Make it public for a portfolio website or private for an operational prototype. Do not add real personal, customer, student, patient or research-participant data to either type of repository. “Private” is an access setting, not a substitute for sound data governance.
Never publish passwords, API keys or .env files. If an assistant asks you to paste a secret into source code, stop and ask it to design a safer configuration.
4. Choose one AI coding assistant
Pick one assistant and stay with it for the session. Switching tools creates the feeling of progress while resetting context.
- ChatGPT with Codex can work with a selected local project through the desktop app, terminal or VS Code extension. Start with the default permissions and only grant access needed for the current folder. See the official Codex getting-started guide.
- Claude Code is another capable option for terminal-based work. Follow its official setup documentation.
The interface matters less than the working relationship. Give the assistant a goal, relevant context, constraints and a definition of done. Ask it to explain unfamiliar actions before it takes them. Review changes rather than accepting everything automatically.
Talk to the assistant like a software engineer
The VS Code terminal is not only a place for commands. When a coding assistant is running there, treat it as a conversation with a software engineer who has access to the project in front of you.
Explain the problem in ordinary language. Describe who is affected, what currently happens, what you expected to happen and what a good result would look like. Share the exact error, the relevant file or a screenshot when you have one. You do not need to translate your problem into programming vocabulary first.
The assistant can inspect files, trace the cause, propose a plan, edit the project, run checks and explain the result. Your job is to provide context, answer product questions and review the work. If you do not understand a proposed action, ask what it changes, why it is needed and how it will be verified.
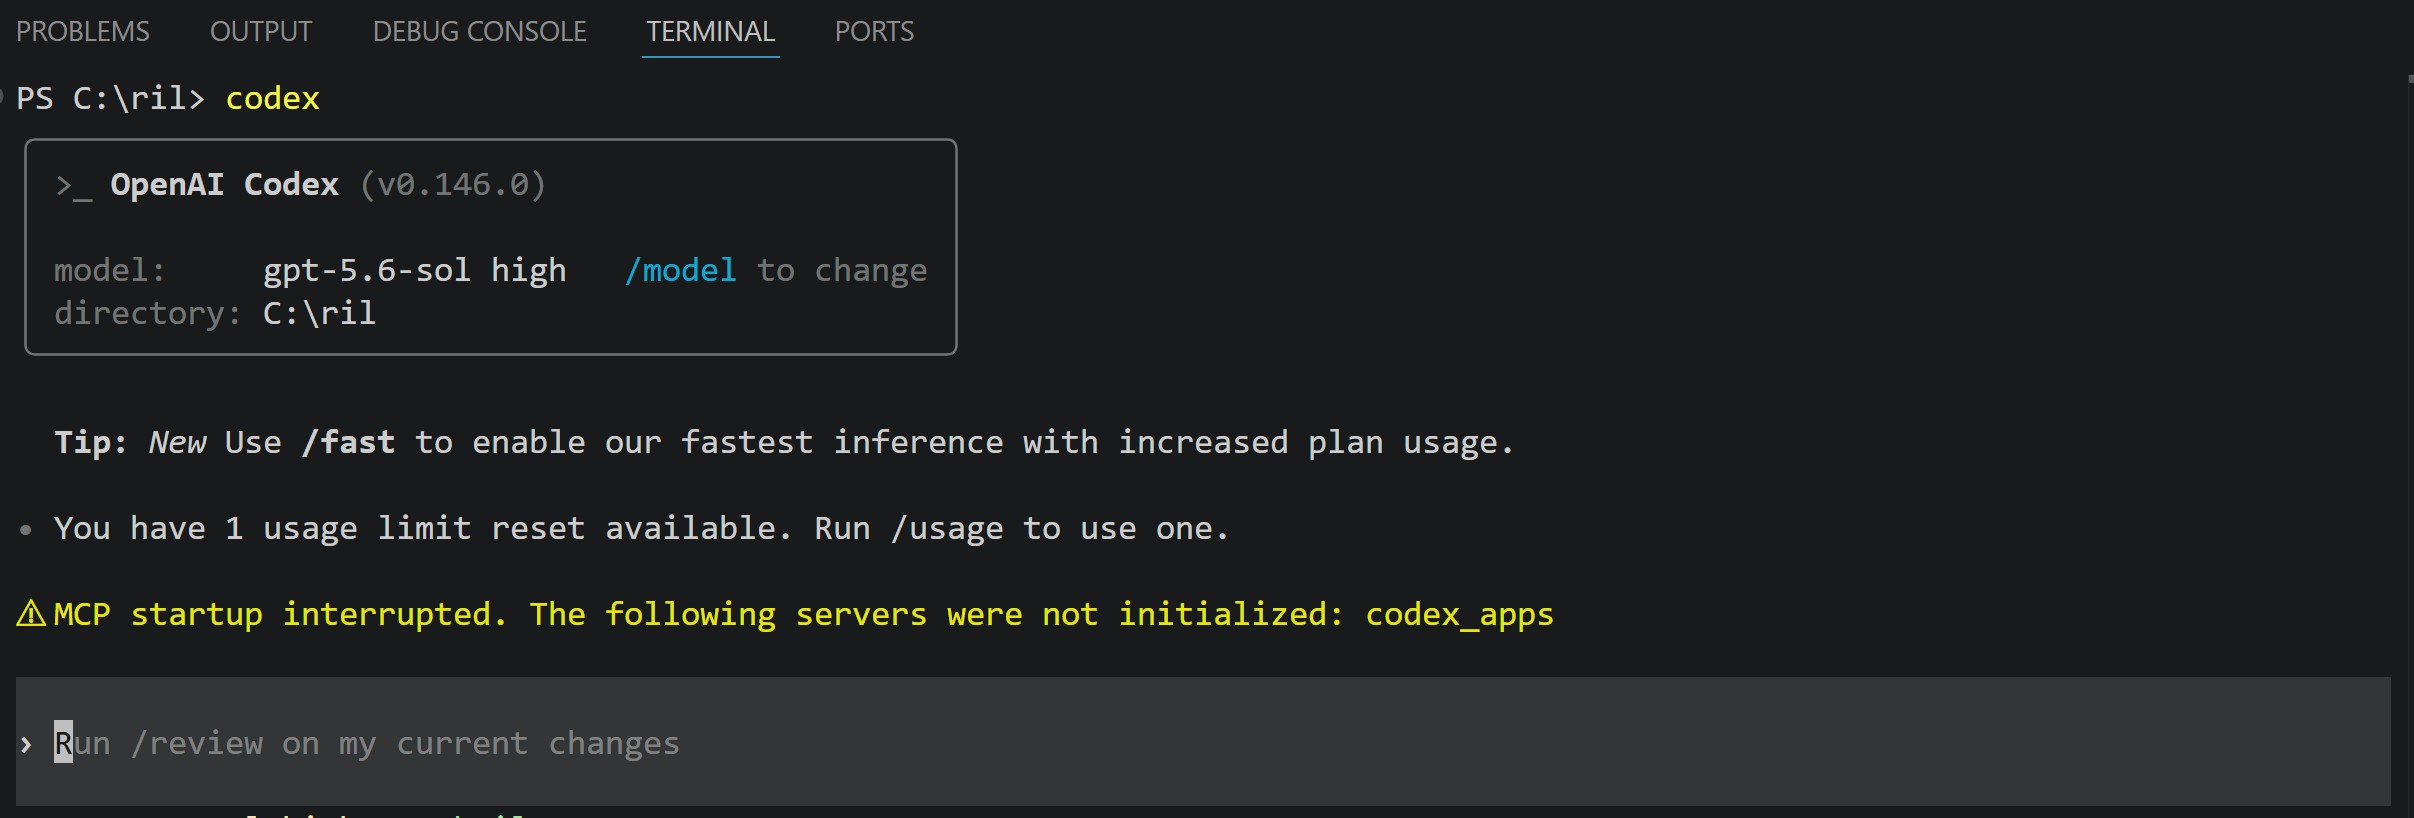
Codex running inside the VS Code terminal. Describe the work as a real problem, then review the plan, changes and evidence.
Use this as your first message:
GOAL
Help me build and publish a small [academic profile / project website / local lead tracker].

CONTEXT
I am a complete beginner. The open folder is the entire project.
My intended user is: [one specific person or group].
Their problem is: [one sentence].

CONSTRAINTS
Keep the first version small. Use plain, well-supported technology.
Do not add services, packages or accounts unless they are necessary.
Do not use real or sensitive data. Explain commands before running them.

DONE WHEN
[List three to five visible checks.]

First inspect the folder, propose a short plan and tell me the first decision I need to make. Do not start editing until the plan is clear.
That prompt is deliberately structured. Goal + context + constraints + done when is more dependable than “make me a great website”. It tells the assistant both where to go and where to stop.
5. Create a Netlify account
Create a Netlify account and connect it to GitHub when prompted. Netlify can import a repository and build a public site from it. Once connected, later changes pushed to GitHub can trigger a fresh deployment automatically.
You will use it near the end, not now. Setup is complete when the account exists; resist the temptation to explore every setting.
Run the two-minute health check
Before building, confirm:
- VS Code has the correct project folder open.
git --versionprints a version number.- You can sign in to GitHub and see your empty repository.
- Your assistant can see only the project you selected.
- You can sign in to Netlify.
If one check fails, copy the exact error into the assistant rather than paraphrasing it. Ask: “What does this error mean, what is the smallest safe fix, and how will we verify the fix?” Error messages are evidence.
Stage 2: Build one small, real thing
The best learning sequence is not theory → mastery → permission to build. It is attempt → feedback → explanation → another attempt. You will understand files, commands and deployment because the project gives them a purpose.
For the universal route, build a one-page website. An academic can make it a research profile; a founder can make it a project, product or evidence page. Ask for these sections only:
- A clear headline explaining the work.
- A short biography or problem statement.
- Three research projects, services or pieces of evidence.
- A current focus or next milestone.
- One honest contact or call-to-action link.
Use Hugo when the website is mainly content
If you are building an academic website, blog, startup brand, company website, portfolio or documentation site, Hugo is an excellent default. Hugo converts content and templates into static web pages. There is no database or continuously running application server to maintain for the published site.
That simple architecture brings useful bonus benefits:
- Pages load quickly and can be served from a global content delivery network.
- Articles and project pages can be written as readable Markdown files.
- Git records changes to content, templates and configuration together.
- Local previews are fast, so you can see an edit in the browser almost immediately.
- Blogs, categories, tags, menus, reusable layouts and multilingual sites are supported without building those systems from scratch.
- The smaller runtime surface usually means fewer updates, failures and security concerns than a database-backed application.
Hugo is not the answer when users must sign in, save private records, make payments or update shared live data. In those cases you are building a web application, not only a content website, and the architecture must include the appropriate application and data services.
Ask the assistant to choose the simplest suitable implementation and explain its choice in two sentences. For a static information page, plain HTML and CSS may be enough. A framework is not automatically more professional; it is additional machinery that must earn its place.
Work in visible passes
Do not ask for the finished project in one giant leap. Use four passes.
Pass 1: Structure
Ask the assistant to create the content hierarchy and basic page, then run it locally. Look only for completeness and order. Can a visitor tell what the page is, who it is for and what to do next?
Create the smallest first version using the plan we agreed.
Use placeholder content where facts are missing and label every placeholder clearly.
Run the page locally, check for errors and tell me the local address to open.
Do not polish the visual design yet.
Pass 2: Content
Replace placeholders with your own factual material. AI can help edit, but it should not invent credentials, publications, customer results, references or quotations. Give it source notes and ask it to preserve uncertainty.
For academic work, verify titles, dates, co-authors, journal names and links against the original records. For founder material, separate observed results from projections. “Reduced processing time by 20% in a five-record test” is evidence; “revolutionises operations” is advertising.
Pass 3: Presentation
Now ask for a deliberate visual system: readable type, restrained colour, strong spacing, clear links and a mobile layout. Describe the qualities you want, such as “editorial, calm, high contrast and generous whitespace”, and name anything you dislike. Concrete direction is easier to interpret than vague praise.
Improve the presentation without changing the factual content.
Aim for an editorial, credible and restrained feel.
Use one accent colour, strong typographic hierarchy and generous spacing.
Make every interactive element work with keyboard focus.
Check the layout at phone, tablet and desktop widths.
Avoid stock gradients, excessive rounded cards and decorative animation.
Pass 4: Behaviour
Add only behaviour that helps the reader: a mobile menu, a copy button, a filter, a small progress indicator or gentle section reveals. Motion should explain a change or guide attention, not delay access. Ask for support for prefers-reduced-motion so people who disable animation are not forced to experience it.
Your job during the build
You are not a passenger. After each pass:
- Open the page yourself.
- Name one thing that works and one thing that is unclear.
- Ask for a targeted change.
- Ask the assistant to run the relevant check.
- Review the changed files or diff before continuing.
Use observable language. “The headline wraps to four lines on my phone” is actionable. “Make it pop” is not. “The contact link should open an email addressed to X” defines behaviour. “Make it more dynamic” does not.
If the assistant makes the same unwanted choice twice, add the preference to SESSION.md. Your instructions are part of the system you are building.
Stage 3: Check before you publish
A generated page is a draft. Verification is where it becomes your work.
Browser testing is essential
We believe 99% of readers following this guide will build something that runs in a browser, whether it is a website, dashboard, CRM or internal system. Browser testing is therefore part of the build, not an optional final polish.
Ask the assistant to open the project in a browser and test it at desktop and mobile widths. It should follow the important user journey, click every control, submit forms with safe sample data, check the browser console for errors and confirm that the visible result matches the brief. If the assistant has browser tools, ask it to provide screenshots and a short test report. You should still repeat the critical journey yourself.
Test the deployed URL as well as the local version. Hosting can expose filename, path, security and environment problems that do not appear on your computer. Where your audience uses different browsers, check at least Chrome or Edge and Safari. A page that only works in the browser you happened to build with is not finished.
For a small Hugo website, blog or company site, the combination of a personal private GitHub repository and Netlify’s Free plan can cost $0 while the project stays within the plan’s usage allowance. You gain private source control, automated deployment, preview builds, HTTPS and global delivery without managing a server. Free does not mean unlimited, so check the current allowance before launching a high-traffic site.
If the system needs a continuously running Python or PHP application, or a database that you administer yourself, a small virtual private server is often the straightforward next step. Entry-level servers commonly start around $5 to $10 per month, depending on provider and capacity. That server also makes you responsible for software updates, access control, backups, monitoring and recovery. Ask the assistant to document those operational duties before treating the system as production-ready.
The truth check
Read every sentence aloud. Mark any claim that you cannot defend. Confirm names, dates, affiliations, citations, results and links from primary sources. Remove generic praise and invented specificity. If the project includes research synthesis, open the cited papers; do not assume a plausible reference exists.
The usefulness check
Give the page to one person from the intended audience for five minutes. Do not explain it. Ask them:
- What is this page offering?
- Who do you think it is for?
- What would you do next?
- What was confusing or missing?
Their answers are more valuable than another hour of solo polishing.
The technical check
Ask the assistant to check the project, but also inspect the result yourself:
- No build or console errors.
- Every link goes to the intended destination.
- Text remains readable on a narrow phone screen.
- Keyboard users can see which link or button is focused.
- Images, if any, have meaningful alternative text and sensible file sizes.
- Headings follow a logical order.
- The page has a descriptive browser title and summary.
- No secret, private note or sensitive record appears in the files.
Do not chase a perfect automated score. Fix actual barriers first: broken navigation, illegible text, missing labels, poor contrast and slow oversized media.
Save a known-good version
When the checks pass, ask the assistant to show you the changes and summarise them. Then create a snapshot:
git status
git add .
git commit -m "Build first publishable version"
Read the output of git status before git add .. It should list only files belonging to this project. A commit is not a magical backup until it also exists somewhere other than your laptop, which is why the next stage matters.
Stage 4: Publish the work
First connect the local project to the empty GitHub repository. GitHub shows the exact commands for your repository; ask your assistant to explain them and use those instructions rather than guessing the address. The typical result is that your local main branch is pushed to GitHub.
Refresh the GitHub page and inspect the files online. If you see a password, key or private data, removing the latest file is not enough because Git retains history. Stop, revoke the exposed credential and get experienced help to clean the repository history before publishing.
Then in Netlify:
- Choose Add new project and Import an existing project.
- Select GitHub and choose your repository.
- Review the suggested build command and publish directory.
- Select Deploy.
- Open the generated
netlify.appURL on both your laptop and phone.
If deployment fails, copy the first meaningful error from the deploy log. Ask the assistant to explain the cause and propose one fix at a time. Do not change five settings simultaneously; you will lose the ability to tell which change solved the problem.
Once the site works, rename the Netlify subdomain to something recognisable. A custom domain can wait. Today’s objective is a reliable public link, not a complete brand infrastructure.
Publishing is not a ceremonial final step. It creates a real audience, exposes assumptions and turns vague pride or dissatisfaction into useful feedback.
Send the URL to one person with a specific request: “Could you open this on your phone and tell me what you think the page is for, plus one confusing point?” Specific feedback prompts produce specific feedback.
If something goes wrong
It will. This is not evidence that the experiment failed.
“The terminal says the command is not recognised”
The program may not be installed, or VS Code may have been open before installation changed the system path. Restart VS Code, run the version check again, and use the official installation guide for your operating system.
“The assistant changed too much”
Stop the run. Ask it to list the files changed and explain why. Use Git to inspect the diff. Revert only after you understand the scope. On the next attempt, constrain the request to named files and one visible outcome.
“The page works locally but not on Netlify”
Local and hosted environments may use different commands, file paths or software versions. Read the deploy log from the topmost relevant error. Confirm that filename capitalisation matches exactly; hosted Linux environments often distinguish Image.jpg from image.jpg even when your local computer does not.
“I do not understand the code”
You do not need to explain every character. You should understand the project map, where content lives, how to run it, what external services it uses and how to undo a change. Ask the assistant for a guided tour tied to those five questions, then record the answers in the README.
“I ran out of time”
Reduce scope, not standards. Publish one good page instead of five partial pages. Remove the filter, animation or database. Keep accurate content, usable navigation, privacy and a clear next action.
Five projects for the next five weeks
Your first build creates the environment. Repetition creates fluency. Choose one project per week, not five at once.
1. The academic or founder website
Expand the page you just built. An academic version can add publications, teaching, research interests and a short public notebook. A founder version can add a problem statement, evidence, product notes and a contact path. Keep facts in a simple format that you can update without redesigning the site.
2. A small relationship tracker
Build a local tool with contacts, status, last interaction, next action and notes. Start with fabricated records. Add import or authentication only when the basic workflow proves useful. If real personal data will enter the system, define access, retention, export and deletion before deployment.
3. A research comparison assistant
Choose a narrow question and a small set of papers you have actually obtained. Ask the assistant to extract methods, sample, claims, limitations and points of disagreement into a table. Require a page or section locator for each claim. Treat the result as an audit-friendly reading aid, not an authority or final literature review.
4. A decision dashboard
Use a non-sensitive spreadsheet with a defined question: “Which programmes missed their target for two consecutive months?” Ask for calculations, an anomaly table and a plain-language summary. Verify totals manually on a small sample. Prediction is optional; clear descriptive analysis is already valuable.
5. A public field note
Publish a short account of what you attempted, what worked, what failed and what you would change. Include screenshots or evidence where appropriate. Reflection turns a single artefact into reusable knowledge and helps the next builder avoid your dead ends.
These projects share a pattern: narrow input, visible output and a human-verifiable test. That pattern matters more than the technology underneath.
The operating rules that keep this useful
Start with the problem, not the model. A newer model cannot rescue an undefined user or an incoherent goal.
Use the smallest sufficient tool. A static page does not need a complex database. A five-row analysis does not need an autonomous agent.
Keep humans responsible for consequential actions. Do not let a beginner prototype automatically send, publish, grade, hire, reject, diagnose, pay or delete.
Keep sensitive data out of experiments. Use synthetic or properly anonymised examples until governance, contracts and security are understood.
Ask for evidence. Require tests, logs, source links, calculations and visible checks. Confidence is not verification.
Save working states. Commit small, meaningful increments. A clean history makes experimentation safer and collaboration calmer.
Publish deliberately. Public does not mean careless. Check ownership, consent, confidentiality, accessibility and accuracy first.
Your 30-day continuation plan
The afternoon is a starting system, not a graduation ceremony.
For the next four weeks, reserve one 90-minute session at the same time each week:
- Week one, improve: collect one piece of real feedback and fix the most important issue.
- Week two, extend: add one feature that serves the same user and problem.
- Week three, document: write a README explaining purpose, setup, decisions, limitations and how to publish.
- Week four, teach: show another beginner the workflow or publish a field note about it.
At the end of each session, write three lines in SESSION.md: what changed, what you verified and the next smallest action. This prevents the next session from beginning with reconstruction.
Do not measure progress by prompts sent, tools tried or hours of video watched. Measure it by artefacts completed, users helped, assumptions tested and lessons recorded.
The real lesson
This syllabus is not ultimately about AI. It is about removing avoidable distance between an idea and reality while retaining judgement, care and accountability.
Twenty years ago, many digital projects required specialist teams before a first version could exist. Modern tools let one motivated person explore much further before needing that team. They do not eliminate expertise. They help you reach the point where the right expert, collaborator or customer can react to something concrete.
That changes education because students can test ideas through artefacts. It changes research because methods and findings can become interactive and accessible. It changes entrepreneurship because evidence can arrive before a large investment. Most importantly, it changes who gets to begin.
The divide is not between people who “understand AI” and people who do not. It is between passive familiarity and an active practice of framing, making, checking and sharing.
Take the afternoon. Build the small thing. Publish it carefully. Then return next week and do it again.
Set up. Build. Check. Publish. Repeat.